
You are using an out of date browser. It may not display this or other websites correctly.
You should upgrade or use an alternative browser.
You should upgrade or use an alternative browser.
Pete's 1960 Wagon
- Thread starter Pete
- Start date
The brake drum and flange, once the taper is popped, makes a great slide hammer to extract the bearing race.
Nate,
My axles have been out before. I tried to use the drum and hub as a slide hammer the first time, and gave up. The races were rusted in place. I wound up using an old drum as a spacer with a block of wood, and a sledge hammer to beat on the drum forcing the axle out. It took a lot of hammering with the sledge to get the rusty races out...
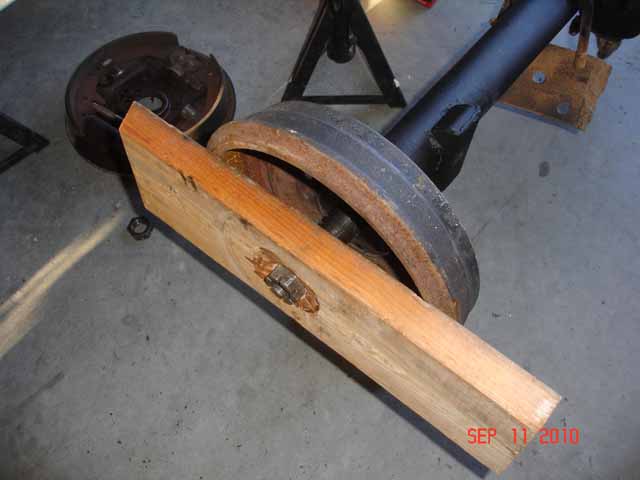
Since then, I have converted to an 11" brake kit, which has the drum loose on the outside of the hub, so there is less weight to use as a slide hammer. Fortunately, the last time it was apart wasn't that long ago, and the race came out without much effort.
Pete
Broken Wagon
Well Oiled
Personally I am looking forward to pictures of the new pupster cruising in the Willys with ya.[emoji41]Nate,
My axles have been out before. I tried to use the drum and hub as a slide hammer the first time, and gave up. The races were rusted in place. I wound up using an old drum as a spacer with a block of wood, and a sledge hammer to beat on the drum forcing the axle out. It took a lot of hammering with the sledge to get the rusty races out...
Since then, I have converted to an 11" brake kit, which has the drum loose on the outside of the hub, so there is less weight to use as a slide hammer. Fortunately, the last time it was apart wasn't that long ago, and the race came out without much effort.
Pete
Hope it goes together without the typical old car trickery.
Duane
Sent from my SM-G920V using Tapatalk
Daisy the dog is ready, hoping to have the wagon ready to take her for a spin in the hills this weekend.

Got the new axle installed this weekend.

Bled the brakes, and found a bunch of air in one of the lines... they work much better now")
Took the wagon our for a test spin, happy to have it back on the road.


Pete
Bled the brakes, and found a bunch of air in one of the lines... they work much better now
Took the wagon our for a test spin, happy to have it back on the road.
Pete
agne2520
Well Oiled
Fine looking pooch and of course your wagon. They seem to go together
54 wagon ken
Well Oiled
English Setter pup ? Gonna be a bird dog ?
English Setter pup ? Gonna be a bird dog ?
Daisy is an English Springer Spaniel. She will be our official hiking/trail companion but probably won't hunt much.
She is about 12 weeks old and is a bundle of energy, perfect for getting us outside.
Pete
Pivnic
Well Oiled
Great looking Puppy Pete. Yeah, your wagon always looks cool in your offroading venues! Glad your Wagon is back on the Road again. Pivnic
Dimmwatt
Precision Fit
What off roading venues? Thats either his front or back yard
Yeah Pete, Great dog! Small enough to make the trip to moab with you for sure! ...except for the whole no dogs in national parks rule...Its a bad rule. It should read, no bad dog owners in national parks.
Yeah Pete, Great dog! Small enough to make the trip to moab with you for sure! ...except for the whole no dogs in national parks rule...Its a bad rule. It should read, no bad dog owners in national parks.
Auggie
Well Oiled
What off roading venues? Thats either his front or back yard
Yeah Pete, Great dog! Small enough to make the trip to moab with you for sure! ...except for the whole no dogs in national parks rule...Its a bad rule. It should read, no bad dog owners in national parks.
I had never heard of this, i couldn't believe it. I do not vist many national parks as i do not take to many vacations currently. i had to go look it up. sounds like a leash would allow the pup to go.
http://petfriendlytravel.com/national_parks
your wagon always looks cool in your offroading venues!
Yep, those last few shots were taken less than five minutes from my house... The benefit of living in a small town in the Idaho Rockies, the back country is steps away. :beer:
Pete
I spent the weekend doing a few maintenance things on my wagon that I've been putting off for quite a while.
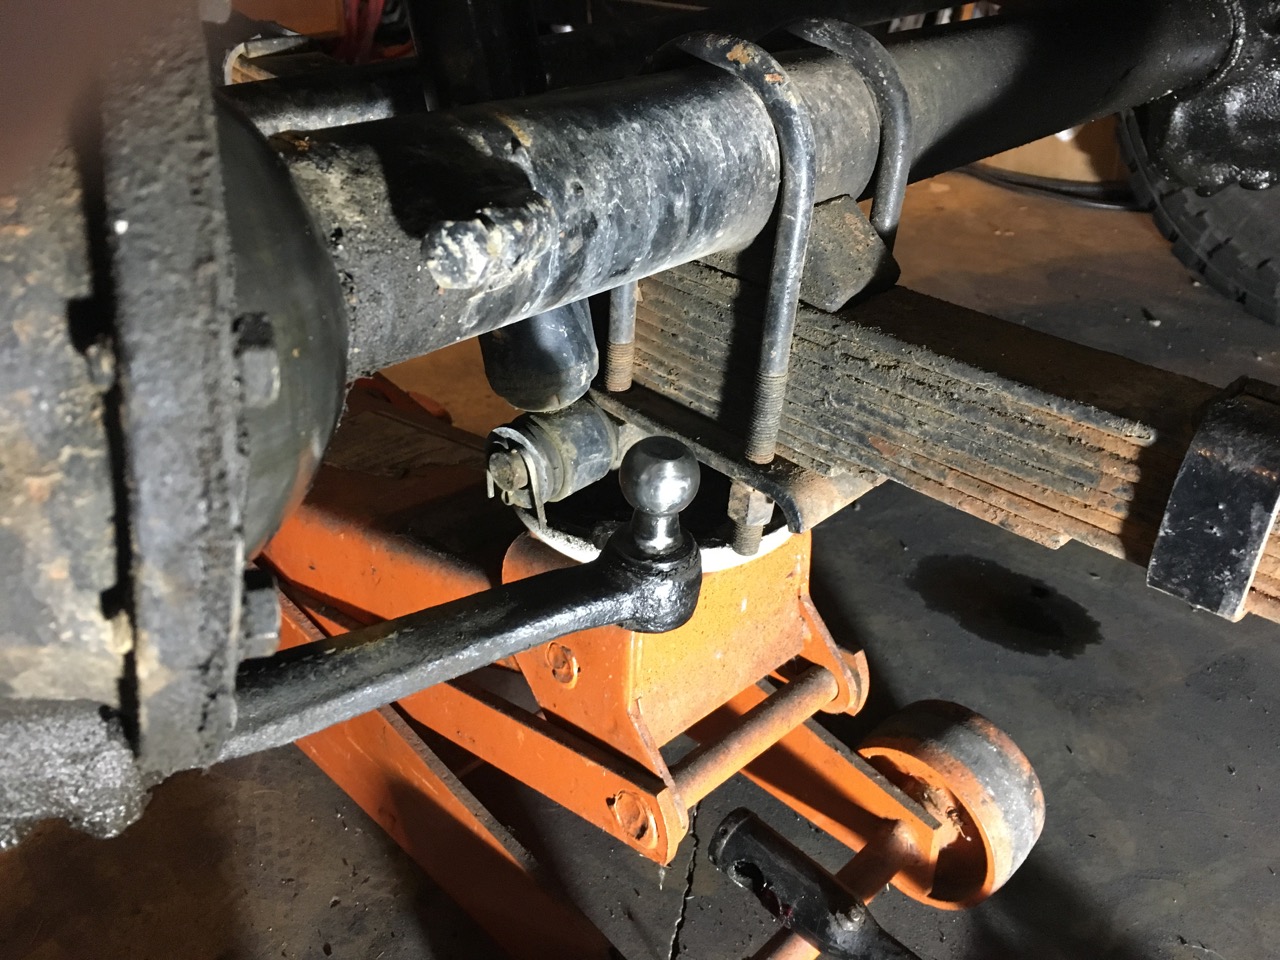
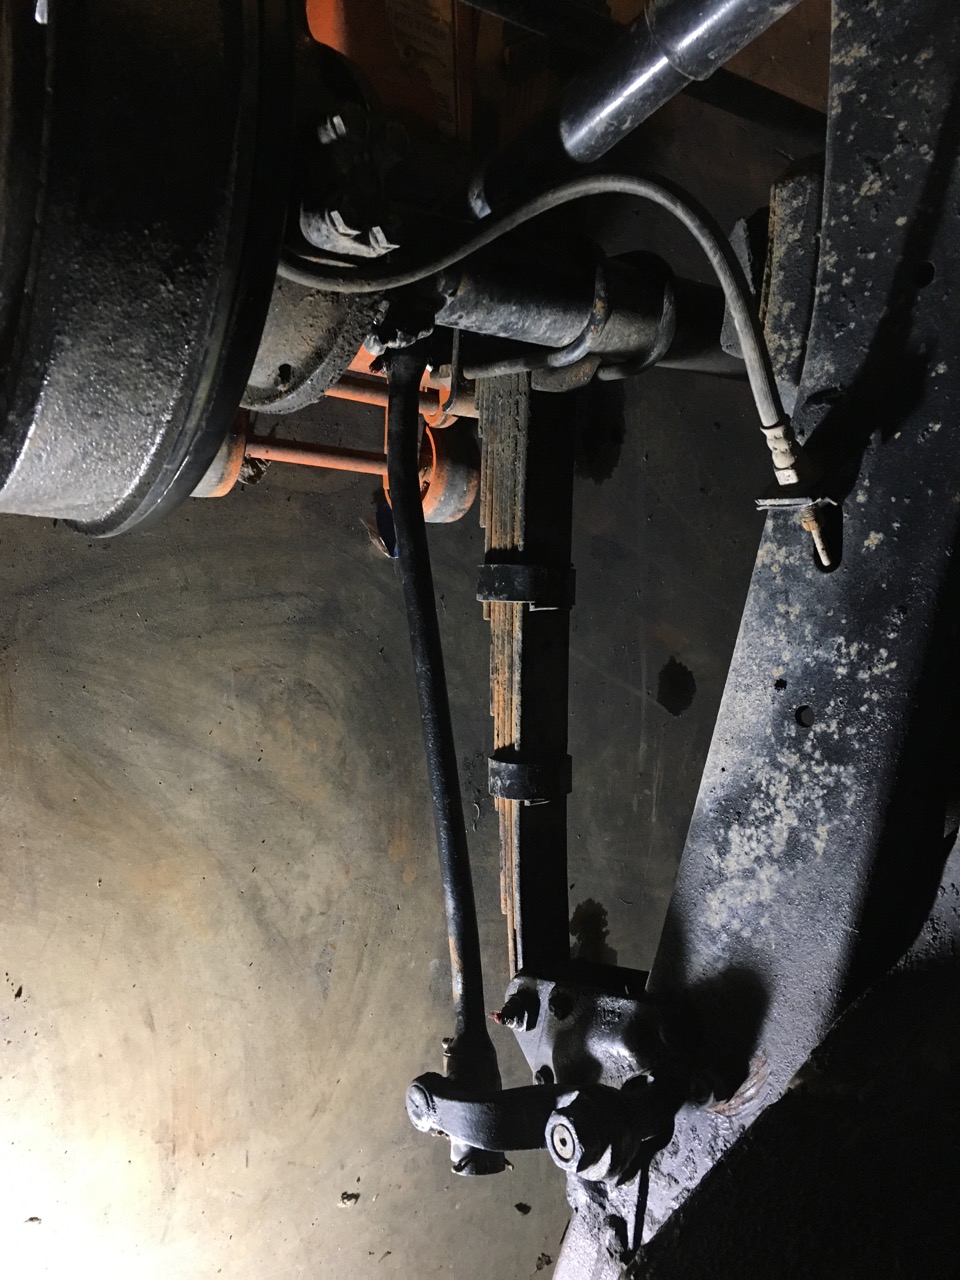
The first, was pulling the drag link apart, cleaning and inspecting the parts, and putting it back together. I did a full rebuild of the drag link back in April of 2012 with new cups and springs. one of the joints was making an occasional clunk noise, so I decided it was time to pull it apart and see what was going on.
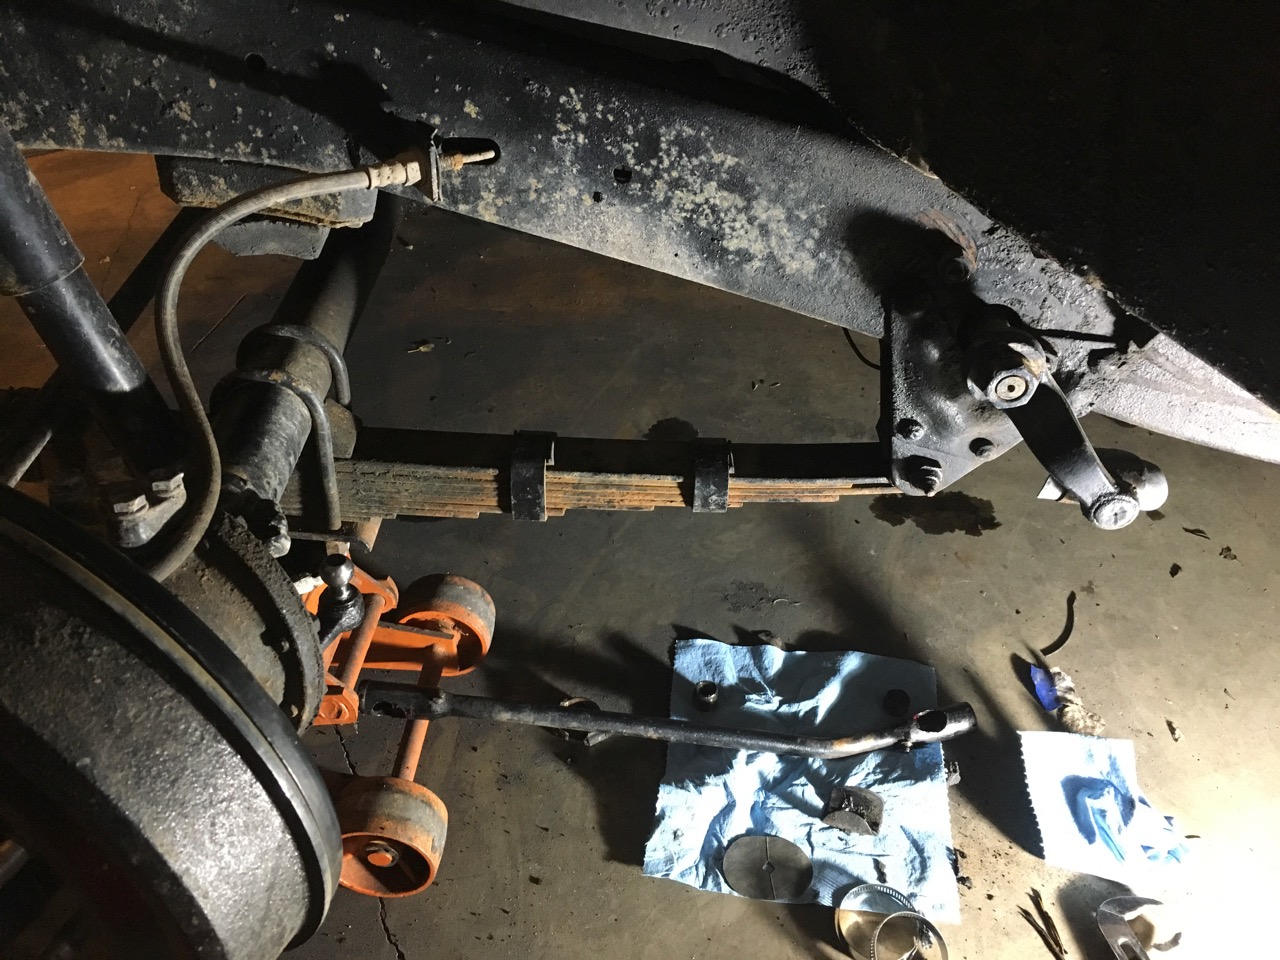
All of the parts look good, no excessive wear, The rear joint was worn more than the front though, I'm assuming from dirt and grit getting in to the joint and grinding away material on the cups.
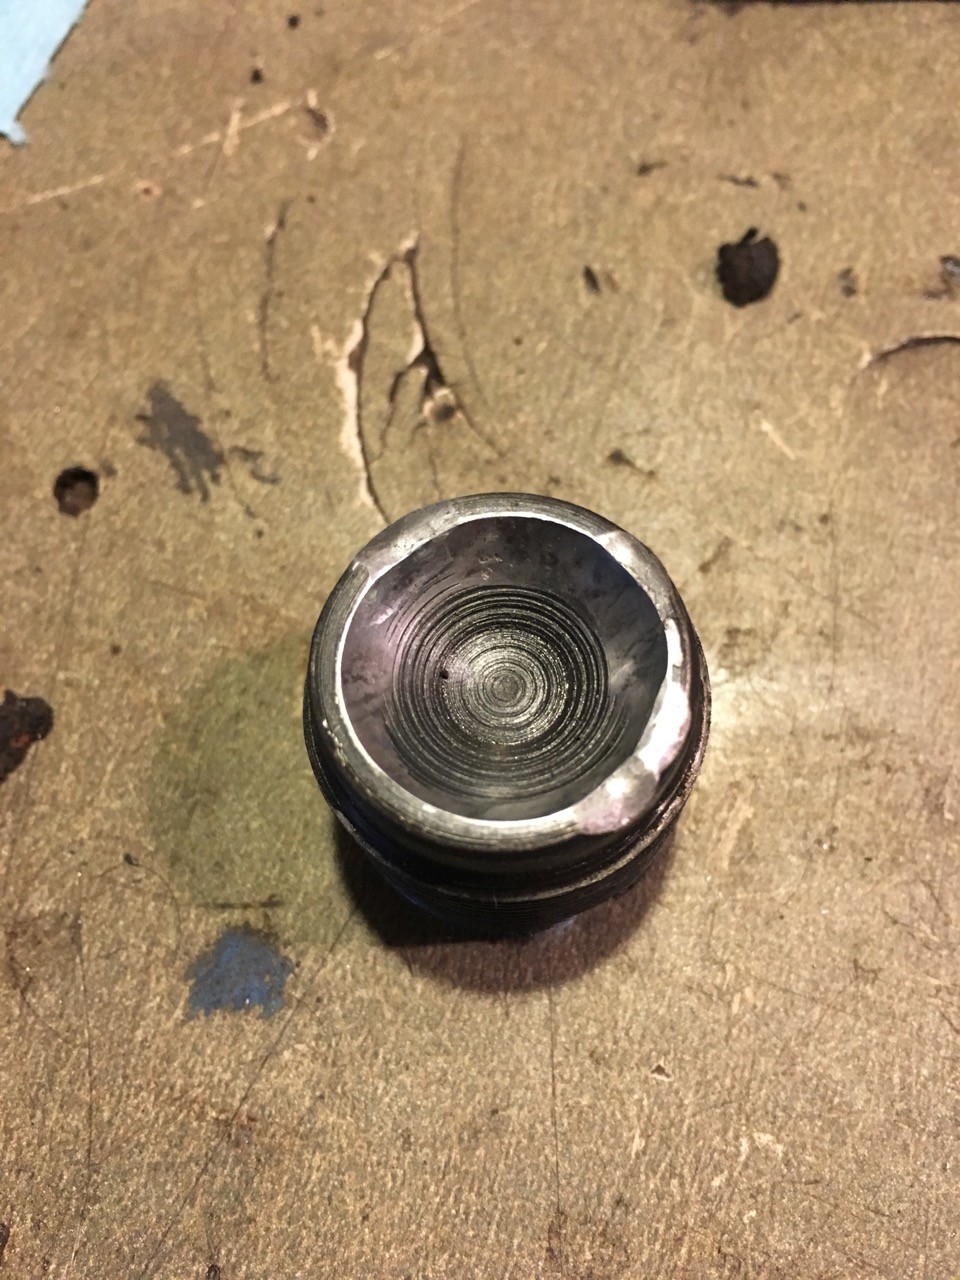
One thing that was a little disconcerting though, was the wear on the front joint plug/cup. It is clear that at some point the joint was loose enough to let the ball far enough out of the socket to pound on the edge of the cup. Not sure why it didn't fall off... I have driven the wagon through some pretty rough stuff in Moab, and I worry about the drag link failing on the trail...
I cleaned up the cups a bit with a file and re-assembled everything, tightened it all up, and re-greased the joints. I also made new rubber seals, the seals that came with the original rebuild kit were hard as a rock and useless. I put hose clamps on the seal retainers to hold them tight to the drag link end, in an effort to keep the dirt out. I wish there was a replacement pitman arm/drag link assembly that uses modern rod ends...
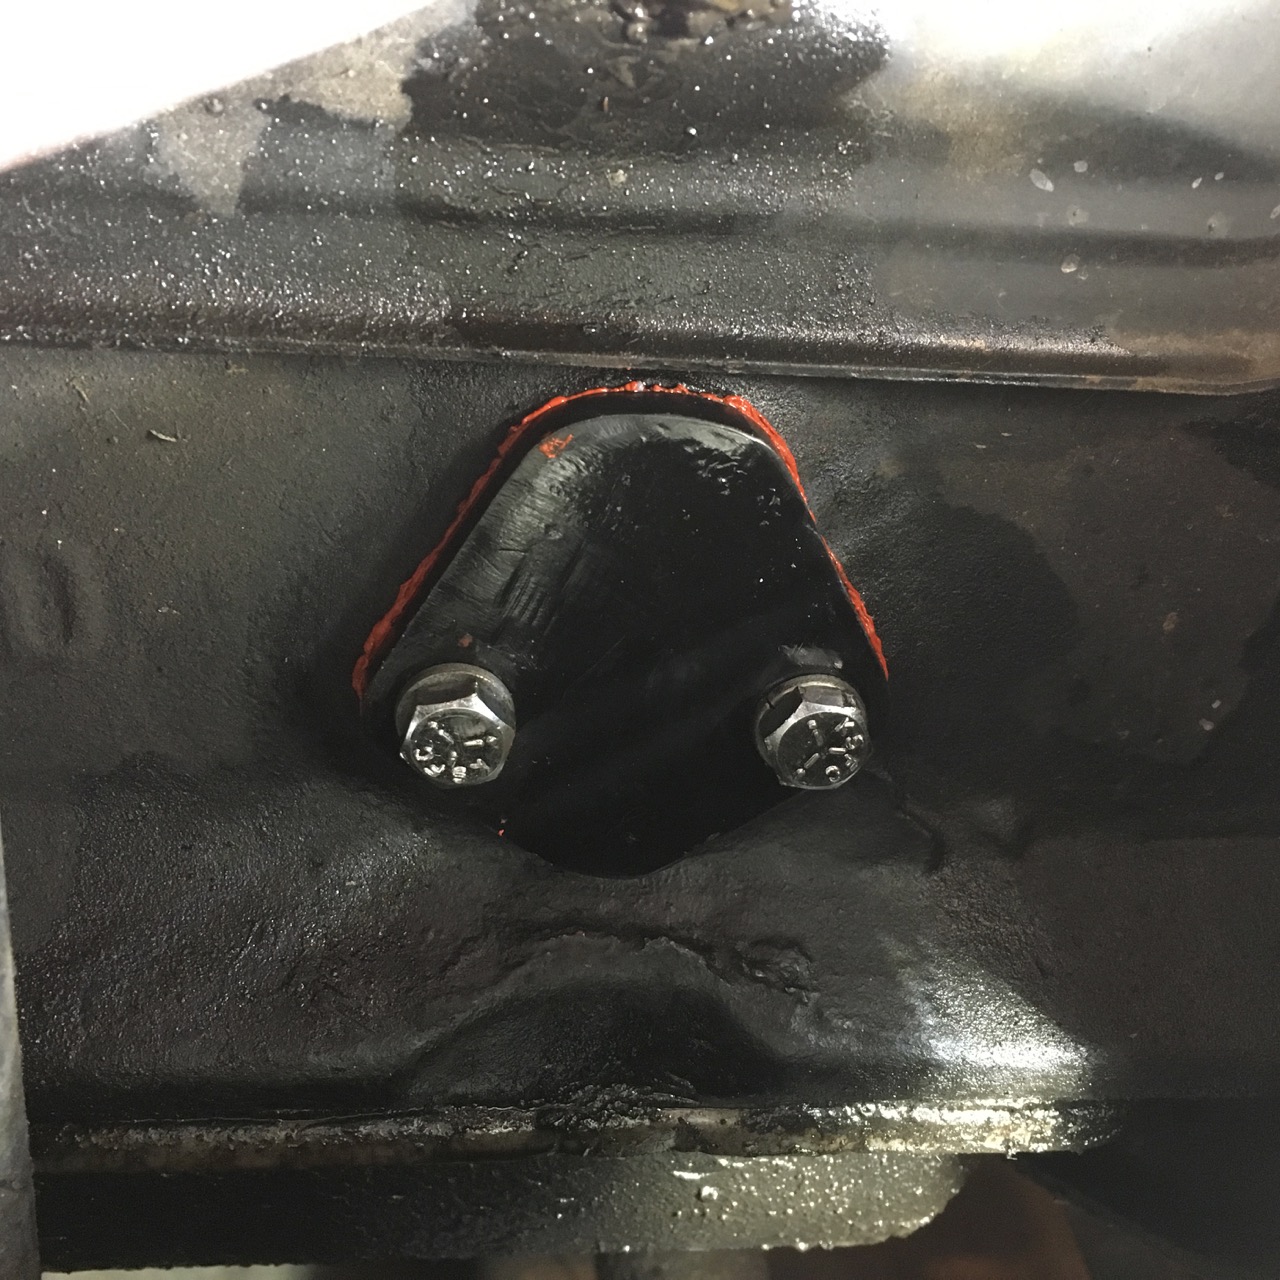
While I was at it, I also lubed the choke cable that took two hands to pull out, got it working like new. I also removed the old fuel pump and made a block off plate to seal the hole in the block. The old pump was a source of oil leaks, and since going to an electric pump last summer it wasn't doing anything. Just need to pressure was the engine again...
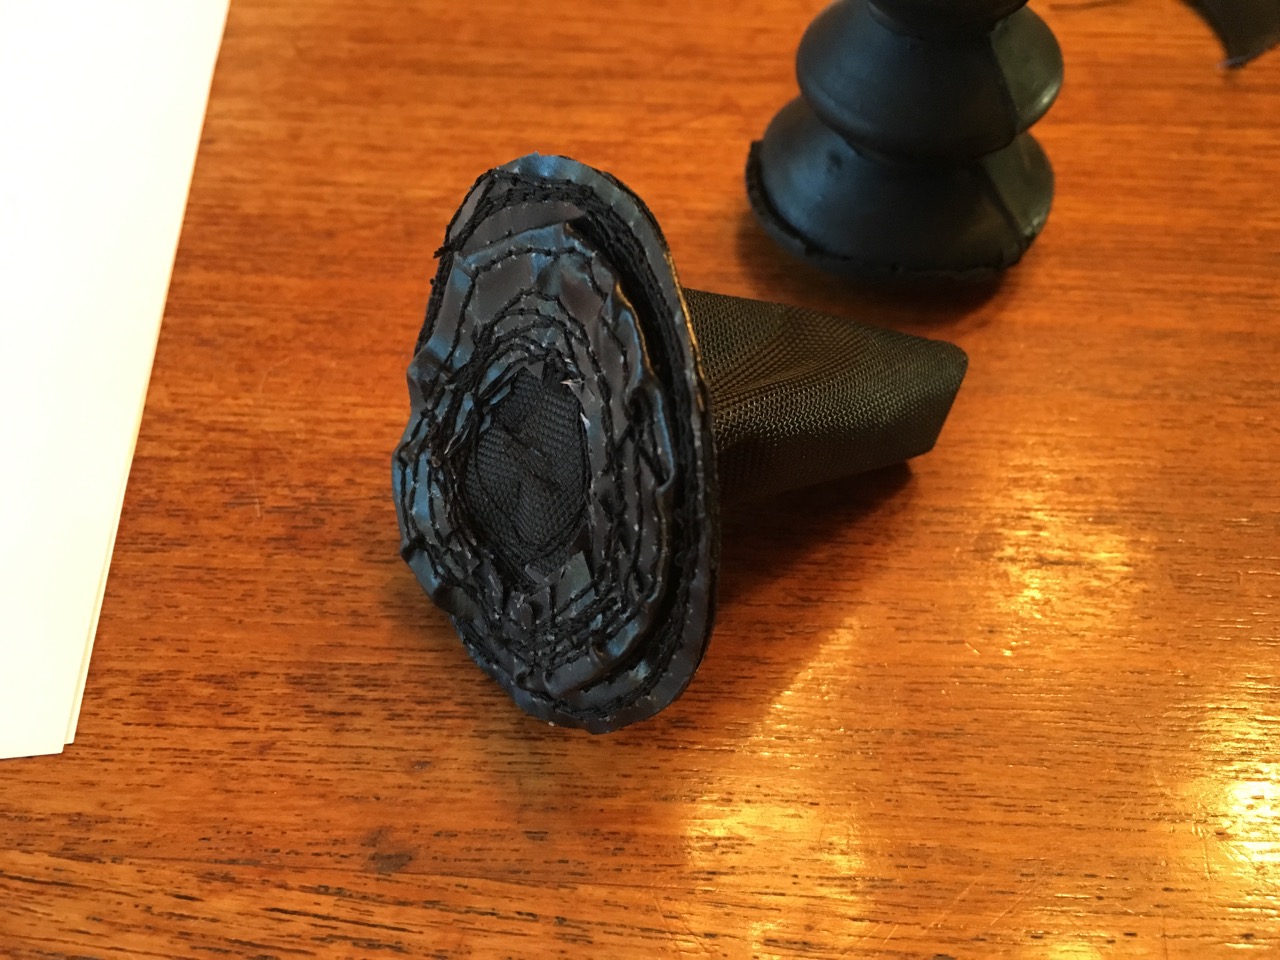
I also made a couple of boots for the floor, out of some leftover heavy nylon drybag material. I've been through three or four throttle pedal boots and t-case shifter boots each since I bought the wagon. The rubber that is used in the replacement boots just doesn't last for more than a season or two in the extreme heat and cold.
The throttle pedal boot I made is based on a leather version I saw online somewhere. It's like a little witches hat, with a double brim. One of the brims goes through the hole in the floor like a grommet, holding it in place. I drug out my old Sailright sewing machine that will motor through any kind of fabric and went to town. It was a pain to sew the small pieces together, but it worked out pretty good.
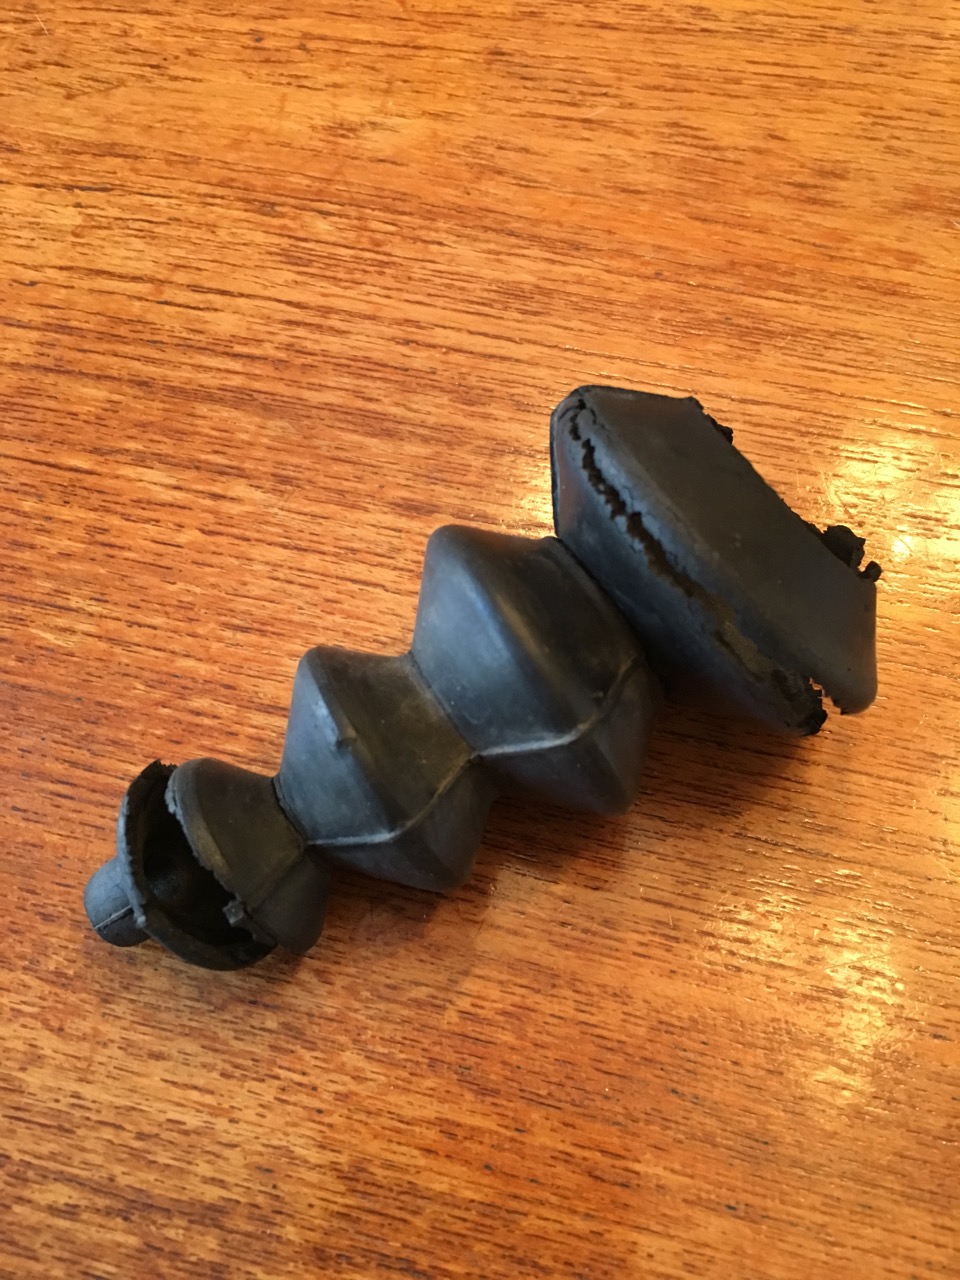
Here's the rubber boot that I pulled out. This one is about 18 months old. Completely dried out and rotten.
And here's the new boot.
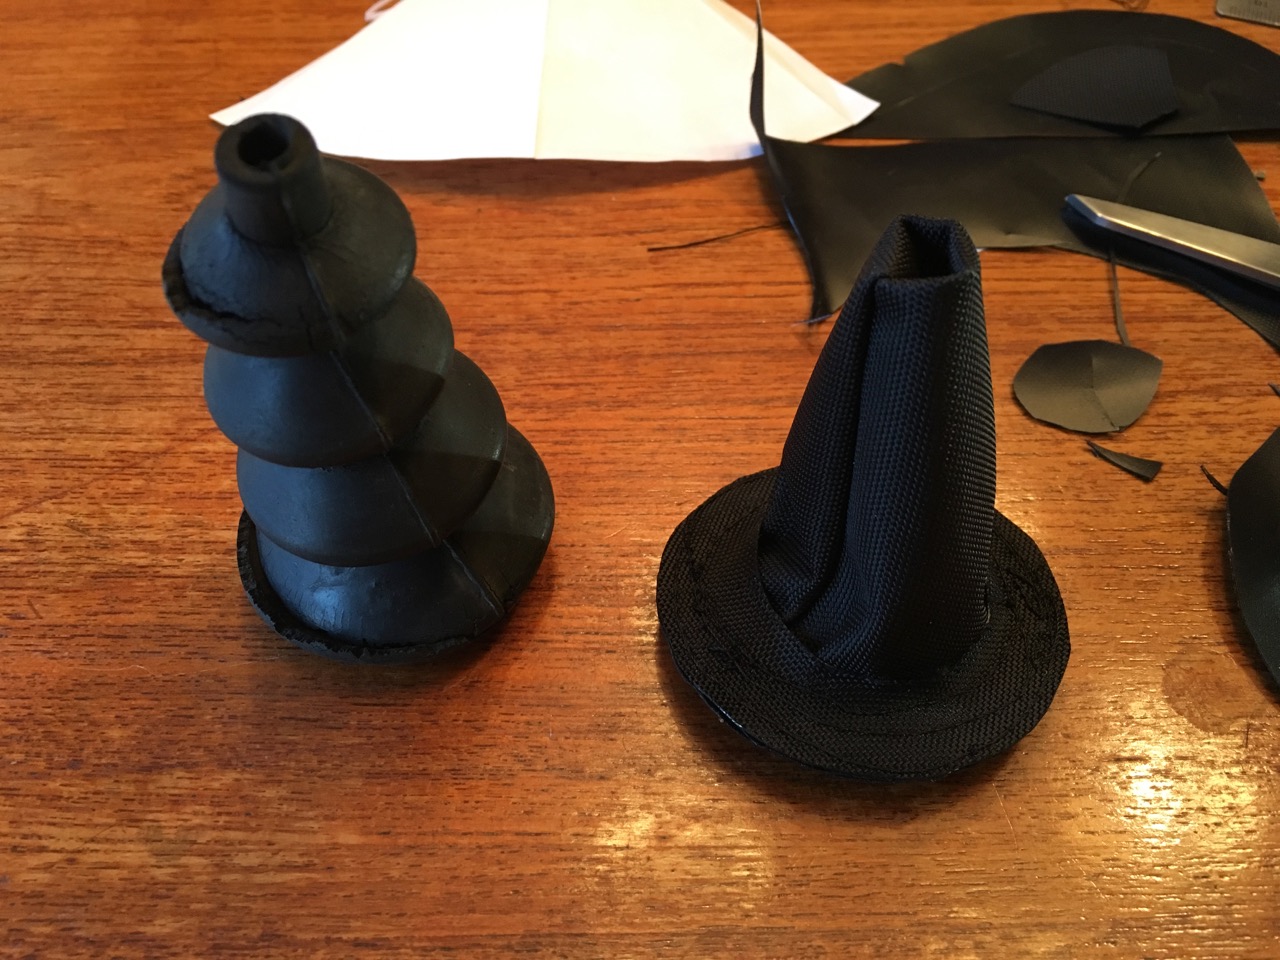
Not pretty, but it works!
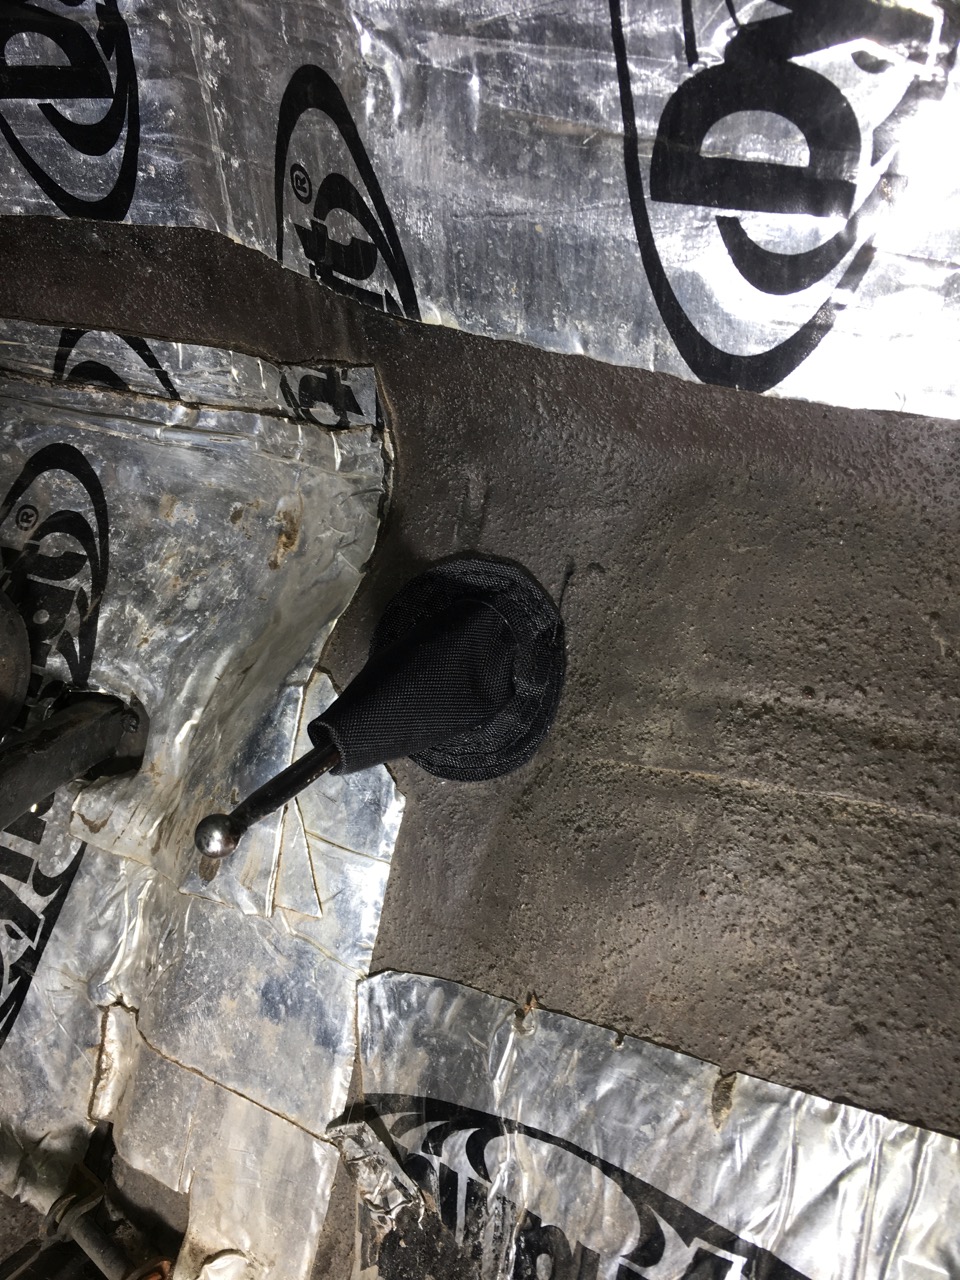
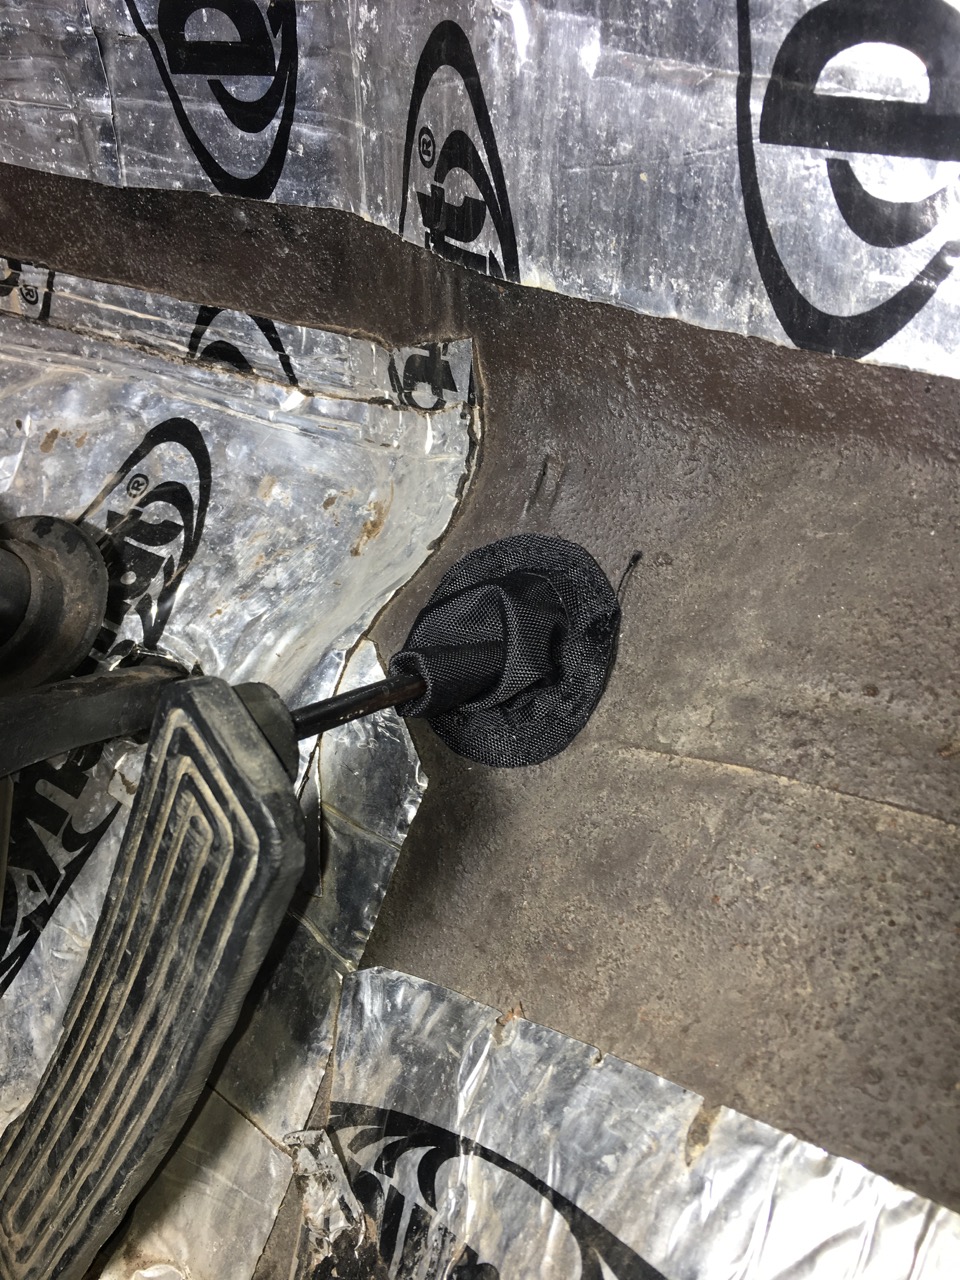
Here it is installed on my ugly floor...
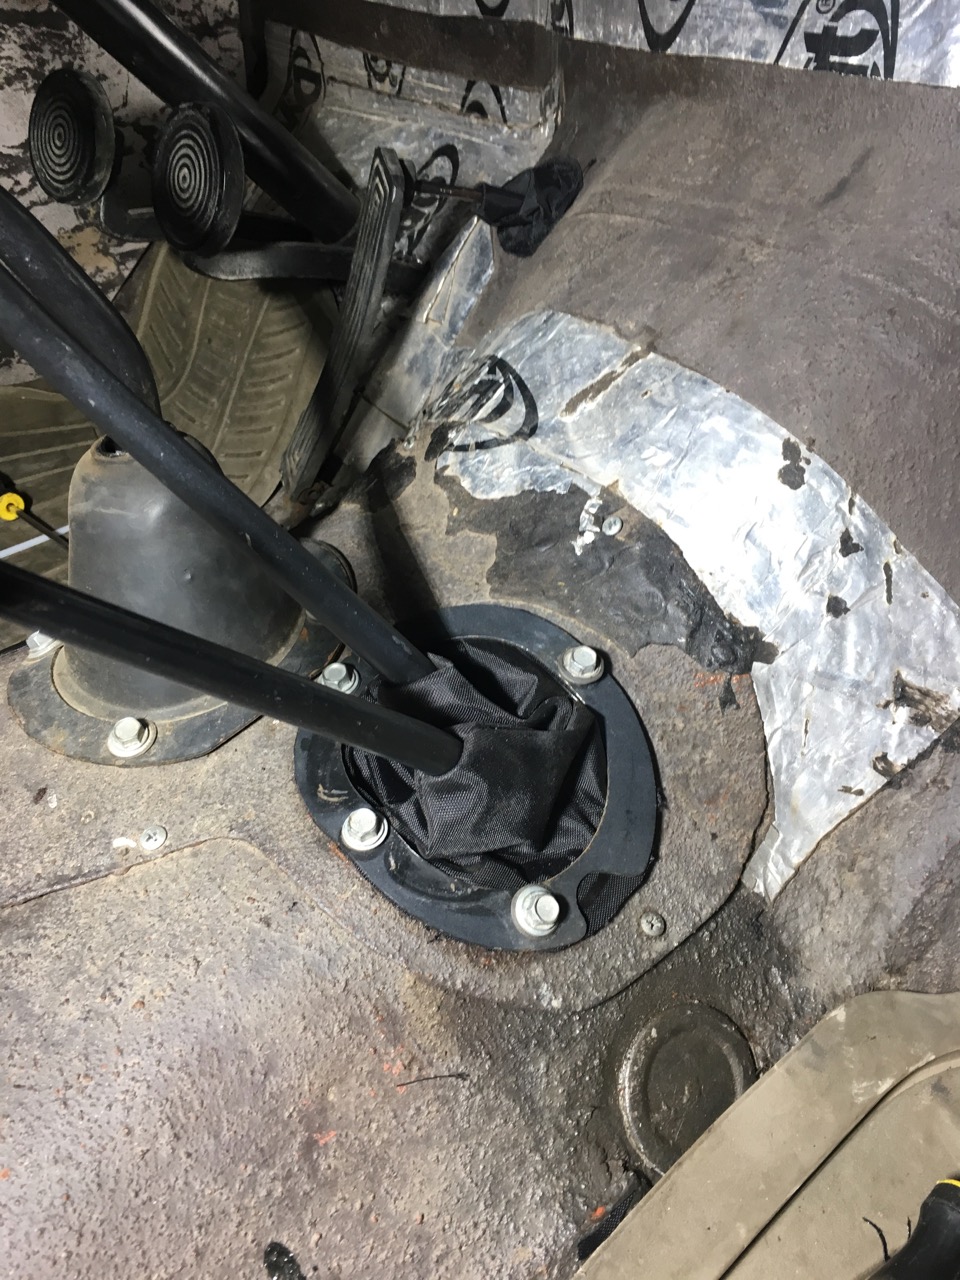
Here's the t-case boot, made out of the same material. It's a little tight, with barely enough material to allow movement for shifting, but at least it will keep the hot air and fumes out.
Took a picture of Daisy, she has grown!

Pete
The first, was pulling the drag link apart, cleaning and inspecting the parts, and putting it back together. I did a full rebuild of the drag link back in April of 2012 with new cups and springs. one of the joints was making an occasional clunk noise, so I decided it was time to pull it apart and see what was going on.
All of the parts look good, no excessive wear, The rear joint was worn more than the front though, I'm assuming from dirt and grit getting in to the joint and grinding away material on the cups.
One thing that was a little disconcerting though, was the wear on the front joint plug/cup. It is clear that at some point the joint was loose enough to let the ball far enough out of the socket to pound on the edge of the cup. Not sure why it didn't fall off... I have driven the wagon through some pretty rough stuff in Moab, and I worry about the drag link failing on the trail...
I cleaned up the cups a bit with a file and re-assembled everything, tightened it all up, and re-greased the joints. I also made new rubber seals, the seals that came with the original rebuild kit were hard as a rock and useless. I put hose clamps on the seal retainers to hold them tight to the drag link end, in an effort to keep the dirt out. I wish there was a replacement pitman arm/drag link assembly that uses modern rod ends...
While I was at it, I also lubed the choke cable that took two hands to pull out, got it working like new. I also removed the old fuel pump and made a block off plate to seal the hole in the block. The old pump was a source of oil leaks, and since going to an electric pump last summer it wasn't doing anything. Just need to pressure was the engine again...
I also made a couple of boots for the floor, out of some leftover heavy nylon drybag material. I've been through three or four throttle pedal boots and t-case shifter boots each since I bought the wagon. The rubber that is used in the replacement boots just doesn't last for more than a season or two in the extreme heat and cold.
The throttle pedal boot I made is based on a leather version I saw online somewhere. It's like a little witches hat, with a double brim. One of the brims goes through the hole in the floor like a grommet, holding it in place. I drug out my old Sailright sewing machine that will motor through any kind of fabric and went to town. It was a pain to sew the small pieces together, but it worked out pretty good.
Here's the rubber boot that I pulled out. This one is about 18 months old. Completely dried out and rotten.
And here's the new boot.
Not pretty, but it works!
Here it is installed on my ugly floor...
Here's the t-case boot, made out of the same material. It's a little tight, with barely enough material to allow movement for shifting, but at least it will keep the hot air and fumes out.
Took a picture of Daisy, she has grown!
Pete
Broken Wagon
Well Oiled
The way that steering joint cup took a beating on the edges makes me think it is from thumping on her off road with the wheels turned. How dare you use your wagon as it was intended. HaHa.
What kind of sewing machine are you using to stitch that boot material? I am looking at a clone of a Sailrite. Wife says I can't use hers anymore.
Duane
Sent from my SM-G920V using Tapatalk
What kind of sewing machine are you using to stitch that boot material? I am looking at a clone of a Sailrite. Wife says I can't use hers anymore.
Duane
Sent from my SM-G920V using Tapatalk
Hedgehog
Precision Fit
Earlier you wrote that your dog wouldn't be much of a hunting dog. I raised Springers I don't believe they ever made a Springer that wasn't a hunting dog at heart. They never quite, they have to stick their noses under everything, all the time. Nice looking field springer you have their. Springer = the happiest tail in the business. Loved mine. Will always remember them fondly.
I'm sure Daisy would be an awesome hunting dog, it's me that won't be much of a hunter...
Pete
The way that steering joint cup took a beating on the edges makes me think it is from thumping on her off road with the wheels turned. How dare you use your wagon as it was intended. HaHa.
What kind of sewing machine are you using to stitch that boot material? I am looking at a clone of a Sailrite. Wife says I can't use hers anymore.
Duane
Sent from my SM-G920V using Tapatalk
I'm sure my Moab habit isn't helping... :cheers: This is the trail that bent my rear axle. Pay no attention to Karl, he likes to chat a lot...
[video=youtube;jQbl_5FlGKM]https://www.youtube.com/watch?v=jQbl_5FlGKM&index=27&list=PLg9JiekSBQcDmt2 4N8XtORlHz3gBqp3MZ[/video]
My sewing machine is a Sailrite, the simple version that does not do zig-zag stitching. It is a bit crude and tempermental, but it will muscle through seven layers of leather. I bought it to do the upholstery for my '50 Plymouth back in 2001 or so. Sold the car before I did the interior, but have used the machine to do a motorcycle seat in heavy vinyl, made saddle bags for a dirt bike, and a handfull of bike tank bags among other odds and ends. Because it has the walking foot, it will motor through just about anything.
Pete
Last edited by a moderator:
Trying to get a bunch of odds and ends done on my wagon while I have time before Moab.
Last weekend I pulled the driver's door window out to lube and adjust. It was so hard to roll up that it took two hands, one to wind the crank, and the other to pull up on the glass.
I loosened the interior window trim screws a tad to take some of the pressure off of the window channel which was pretty tight. I also pulled out the regulator and scissor arms and cleaned and lubed them.
Put it all back together, and it works much better. It's still a little stiff, but the glass will go up and down without much effort.
I also fixed my horn. The previous owner had installed a cheap plastic horn, and wired it to a steering column mounted tin button. It looked ugly, and sounded like a dying calf in a rain storm when "honked". Since it didn't work worth a damn, I removed the cheap button and stuffed it under the dash years ago and haven't had a working horn since.
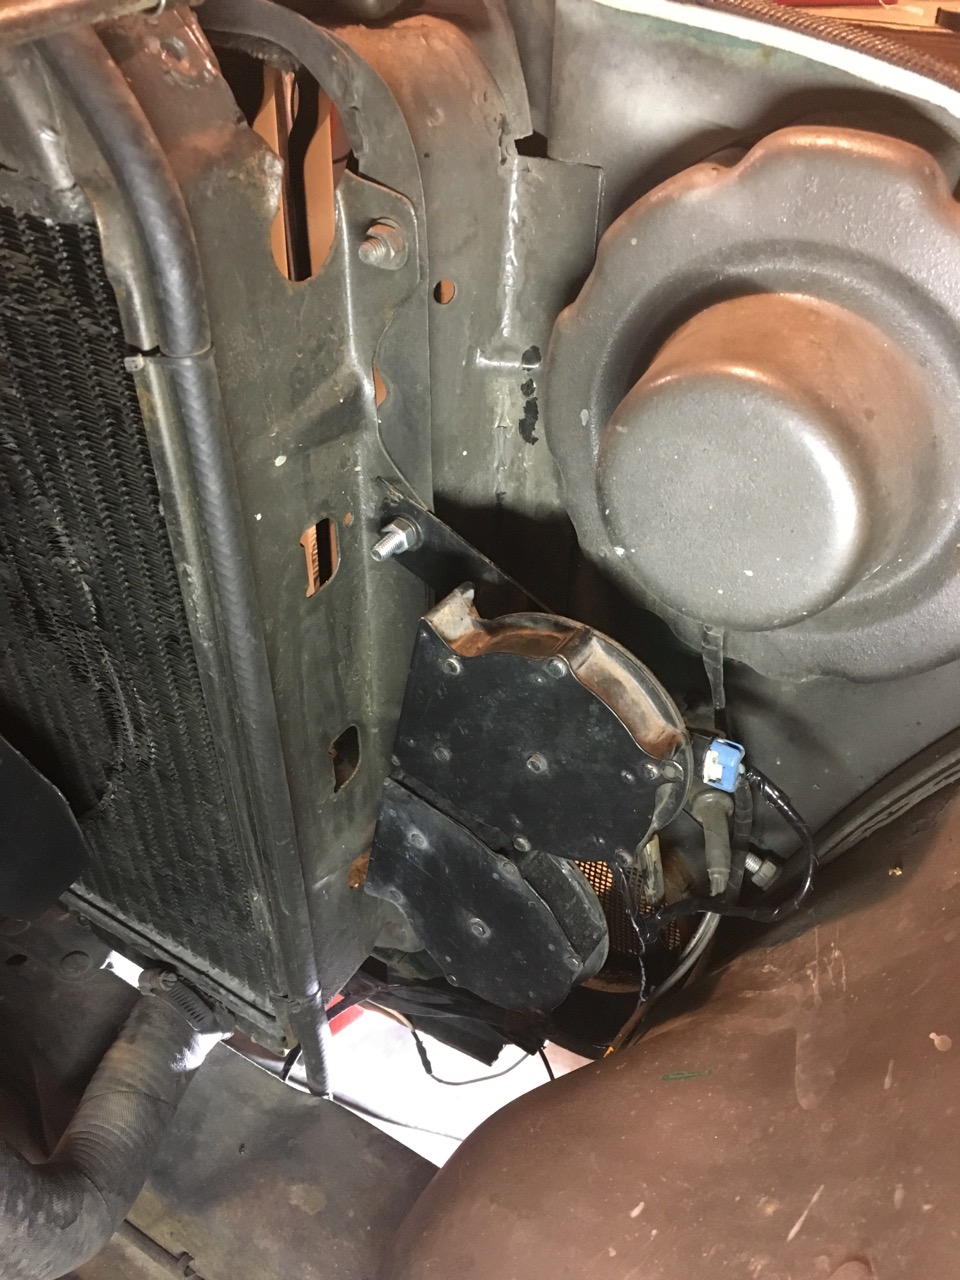
Joseph saved the horns from the Cadillac crash car from last summer, so I had a pair of good horns laying around. I mounted them next to the radiator in a couple of existing holes. They look like they are supposed to be there.
I also replaced the wire in the steering column which had been spliced before and was just hanging out of the bottom of the column tube. The wire is crimped to a brass contact under the horn button, so I cut the wire off flush, drilled out the remains of wire, and soldered a new wire into the contact.
The old horn was wired through a horn relay, but I found that the reason the old horn didn't work right was that it was wired ass-backwards and the relay wasn't doing anything at all. I swear, nearly everything that the previous owner had done to the wagon was upside down, backwards, or just stupidly wrong.
The old relay was still good, so I wired it correctly to the horn button, and it works great. It's nice to have a working horn after all these years. I've had a few near misses on the road and a good horn would have helped...
The old cheapo horn-
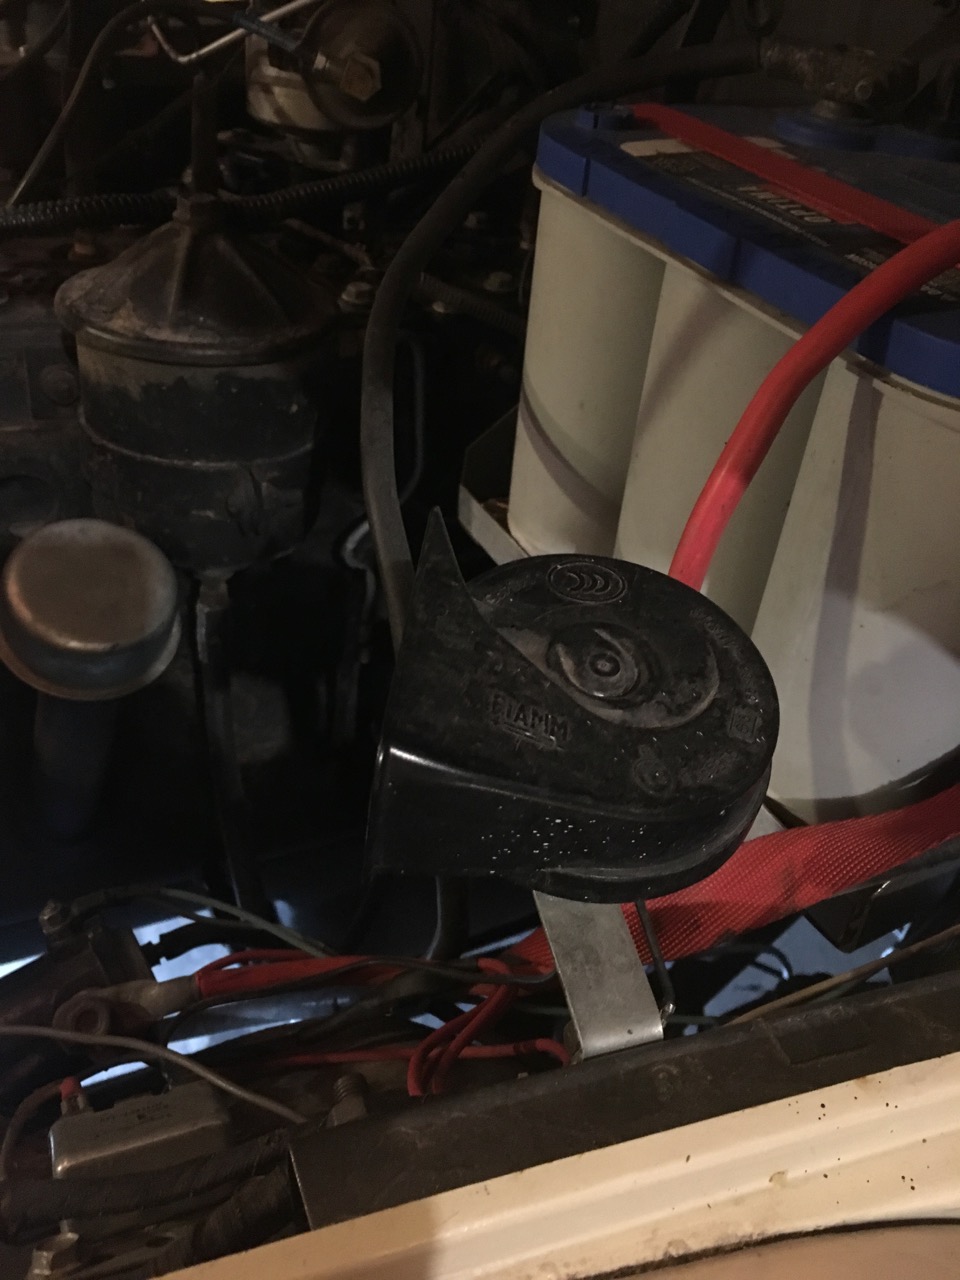
The new GM horns-
Once I had the horn wrapped up, I decided to take a look at the rear shackle bushings. I could tell the bushings were worn from the cracked edges and sag, but here's what I found when I got them out.
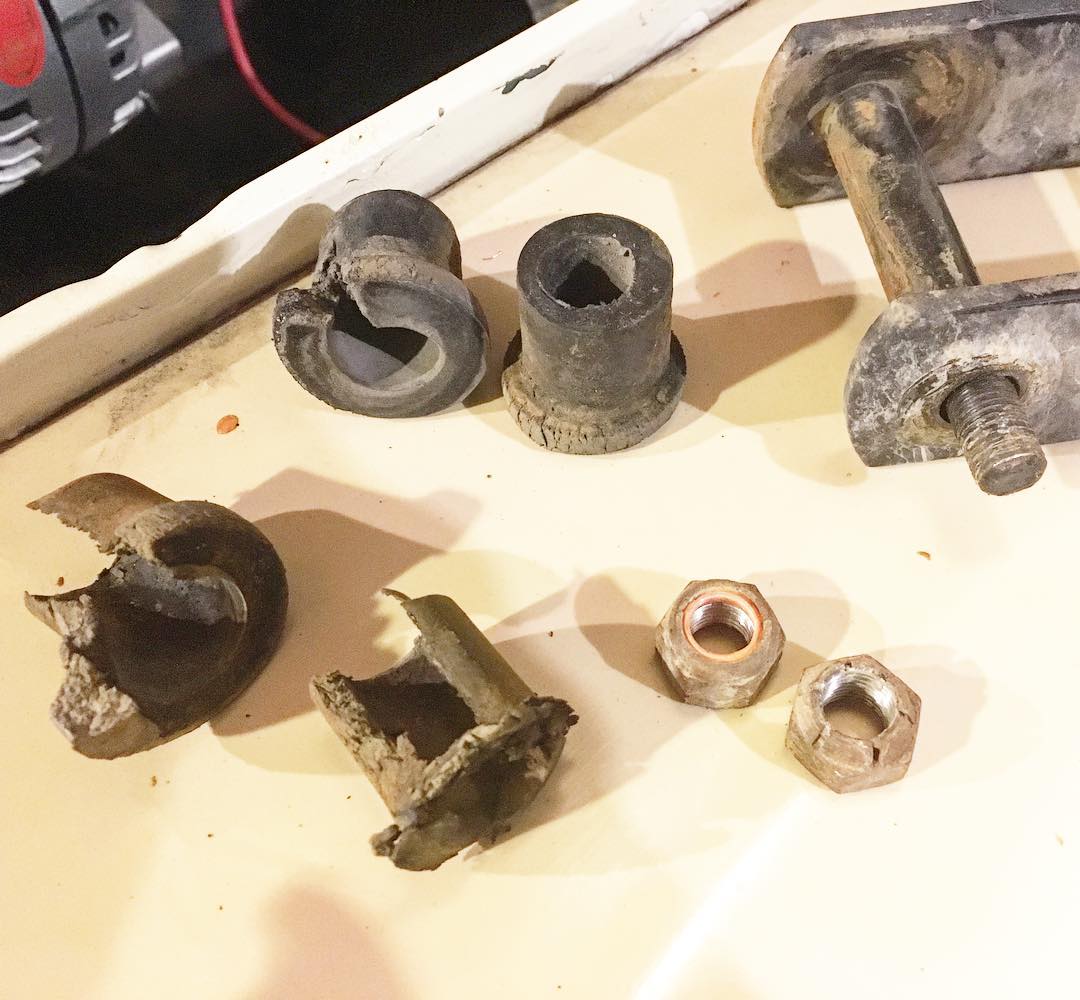
These bushings are about 5 years old... The rubber parts available from Crown and Omix-ADA leaves alot to be desired to say the least. These bushings are in worse shape after five years than the original Willys bushings they replaced that were 60 years old.
The stuff they sell may be fine for trailer queens or museum cars, but I drive my wagon daily and want it to last. I didn't want to bother with buying more crap rubber bushings that would begin to fail upon installation, so I ordered a CJ shackle kit online with poly bushings hoping they would fit. When I got the kit, I found that the bushings were a bit small, but the kit came with slightly longer shackles and grease bolts. The 1/2"-3/4" lift I'll get with these shackles won't hurt...
I was able to find a set of poly bushings that I think will work, with the grease bolts and sleeves of the CJ shackle kit. As soon as the parts arrive, I'll see if it will all go together...
More to come!
Pete
Last weekend I pulled the driver's door window out to lube and adjust. It was so hard to roll up that it took two hands, one to wind the crank, and the other to pull up on the glass.
I loosened the interior window trim screws a tad to take some of the pressure off of the window channel which was pretty tight. I also pulled out the regulator and scissor arms and cleaned and lubed them.
Put it all back together, and it works much better. It's still a little stiff, but the glass will go up and down without much effort.
I also fixed my horn. The previous owner had installed a cheap plastic horn, and wired it to a steering column mounted tin button. It looked ugly, and sounded like a dying calf in a rain storm when "honked". Since it didn't work worth a damn, I removed the cheap button and stuffed it under the dash years ago and haven't had a working horn since.
Joseph saved the horns from the Cadillac crash car from last summer, so I had a pair of good horns laying around. I mounted them next to the radiator in a couple of existing holes. They look like they are supposed to be there.
I also replaced the wire in the steering column which had been spliced before and was just hanging out of the bottom of the column tube. The wire is crimped to a brass contact under the horn button, so I cut the wire off flush, drilled out the remains of wire, and soldered a new wire into the contact.
The old horn was wired through a horn relay, but I found that the reason the old horn didn't work right was that it was wired ass-backwards and the relay wasn't doing anything at all. I swear, nearly everything that the previous owner had done to the wagon was upside down, backwards, or just stupidly wrong.
The old relay was still good, so I wired it correctly to the horn button, and it works great. It's nice to have a working horn after all these years. I've had a few near misses on the road and a good horn would have helped...
The old cheapo horn-
The new GM horns-
Once I had the horn wrapped up, I decided to take a look at the rear shackle bushings. I could tell the bushings were worn from the cracked edges and sag, but here's what I found when I got them out.
These bushings are about 5 years old... The rubber parts available from Crown and Omix-ADA leaves alot to be desired to say the least. These bushings are in worse shape after five years than the original Willys bushings they replaced that were 60 years old.
The stuff they sell may be fine for trailer queens or museum cars, but I drive my wagon daily and want it to last. I didn't want to bother with buying more crap rubber bushings that would begin to fail upon installation, so I ordered a CJ shackle kit online with poly bushings hoping they would fit. When I got the kit, I found that the bushings were a bit small, but the kit came with slightly longer shackles and grease bolts. The 1/2"-3/4" lift I'll get with these shackles won't hurt...
I was able to find a set of poly bushings that I think will work, with the grease bolts and sleeves of the CJ shackle kit. As soon as the parts arrive, I'll see if it will all go together...
More to come!
Pete
Broken Wagon
Well Oiled
Those bushings are a huge disappointment. Imagine what you could be working on if you didn't have to redo 5 or 6 year old repairs.
If you are messing with a horn, you must be pretty ready for Moab mechanically. Looking forward to pictures.
Duane
Sent from my SM-G920V using Tapatalk
If you are messing with a horn, you must be pretty ready for Moab mechanically. Looking forward to pictures.
Duane
Sent from my SM-G920V using Tapatalk
Those bushings are a huge disappointment. Imagine what you could be working on if you didn't have to redo 5 or 6 year old repairs.
If you are messing with a horn, you must be pretty ready for Moab mechanically. Looking forward to pictures.
Duane
Sent from my SM-G920V using Tapatalk
I can't remember now if I bought the shackles from Walck's or KW, but it was one or the other. They are usually pretty good about replacing failed parts, but I don't want to have to keep replacing failed parts.
I'm tackling the little stuff mostly, trying to decide if I want to dive into changing the clutch, or try to get another year out of it. It chatters like mad, and has been that way since I bought it. Last time I had the trans and t-case out I didn't have the $ for a new clutch, so I left it. I have a new clutch on my spare motor just sitting there, but lacking the gumption. I really want to put a Terra-Low gear set in my T-case, but not sure I'll be able to swing it before Moab. If I can pull that off, I'll definitely do the clutch at the same time.
Meanwhile, on to more little stuff that I normally don't have time to worry about. Gotta get some stuff done on Joseph's wagon too, before he gets home. He flies in the night before we roll out for Moab, so his wagon will have to be road ready when he gets here.
Pete